
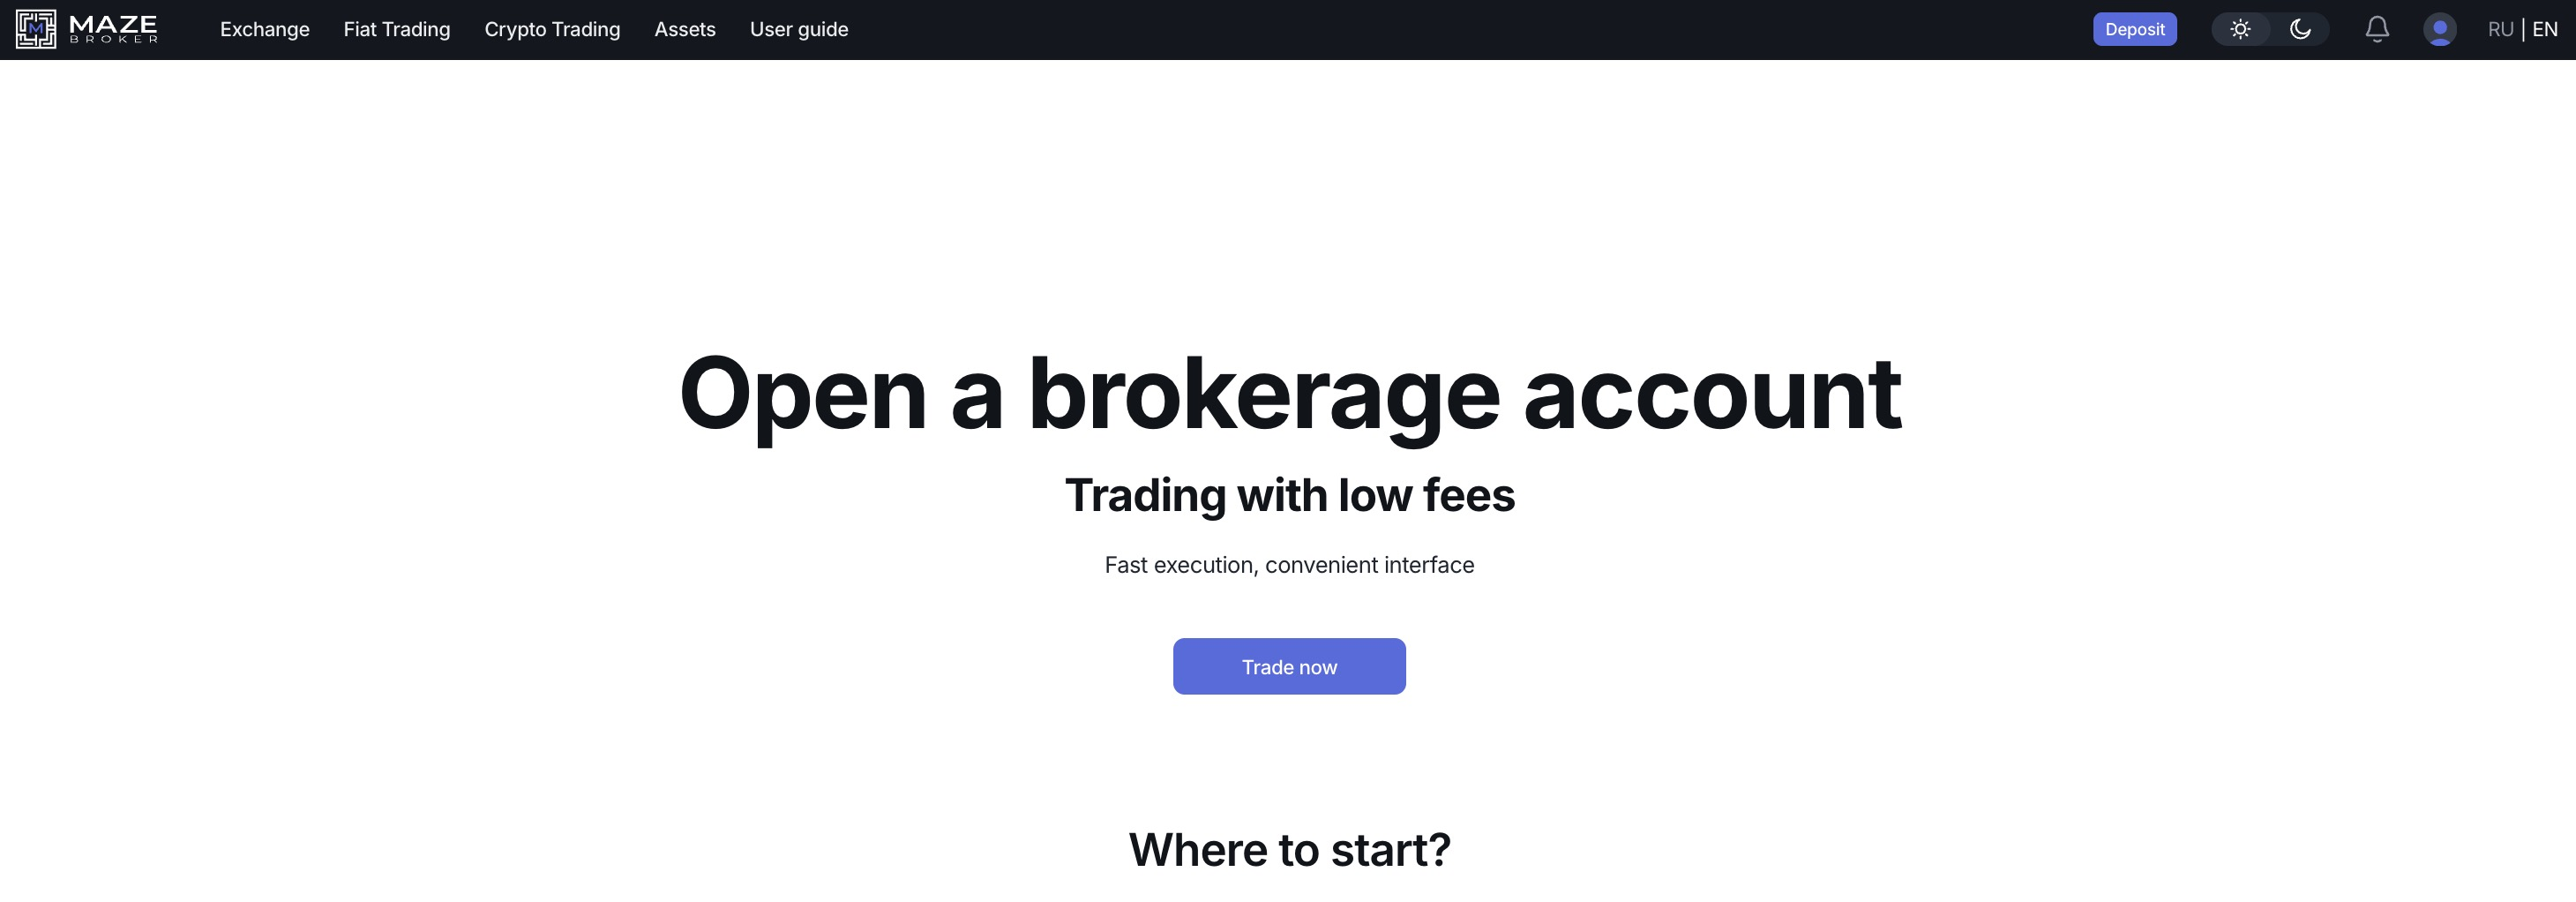
User Guide on the
MAZE Broker Platform
The MAZE platform offers a fast and convenient way to top up your balance in rubles via the Faster Payments System (SBP). The process takes just a few minutes and does not require entering bank details.
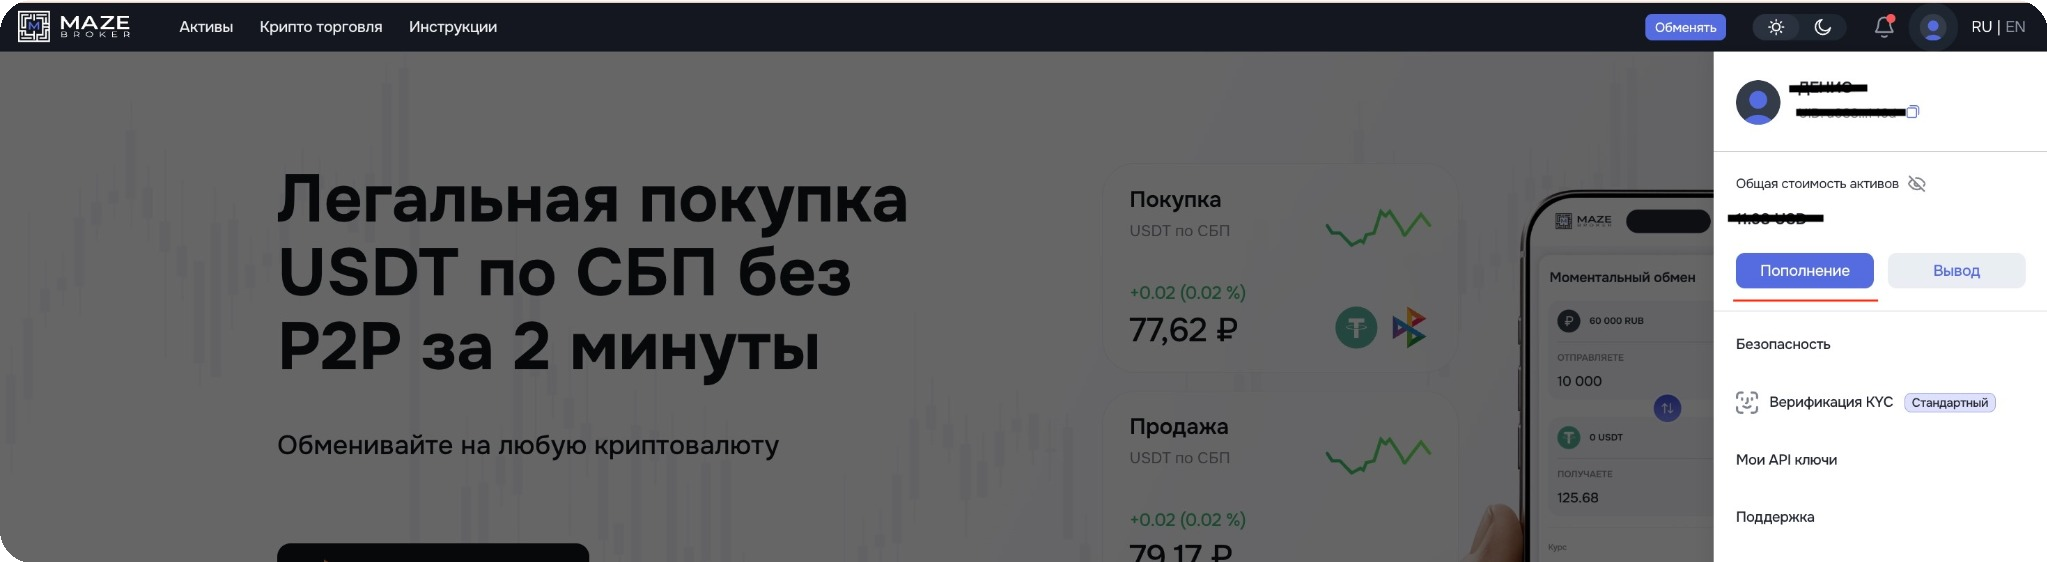
1. Go to the deposit section
In the top menu of the platform, click the “Deposit” button — the balance top-up form will open. In the form, select the RUB (rubles) tab.
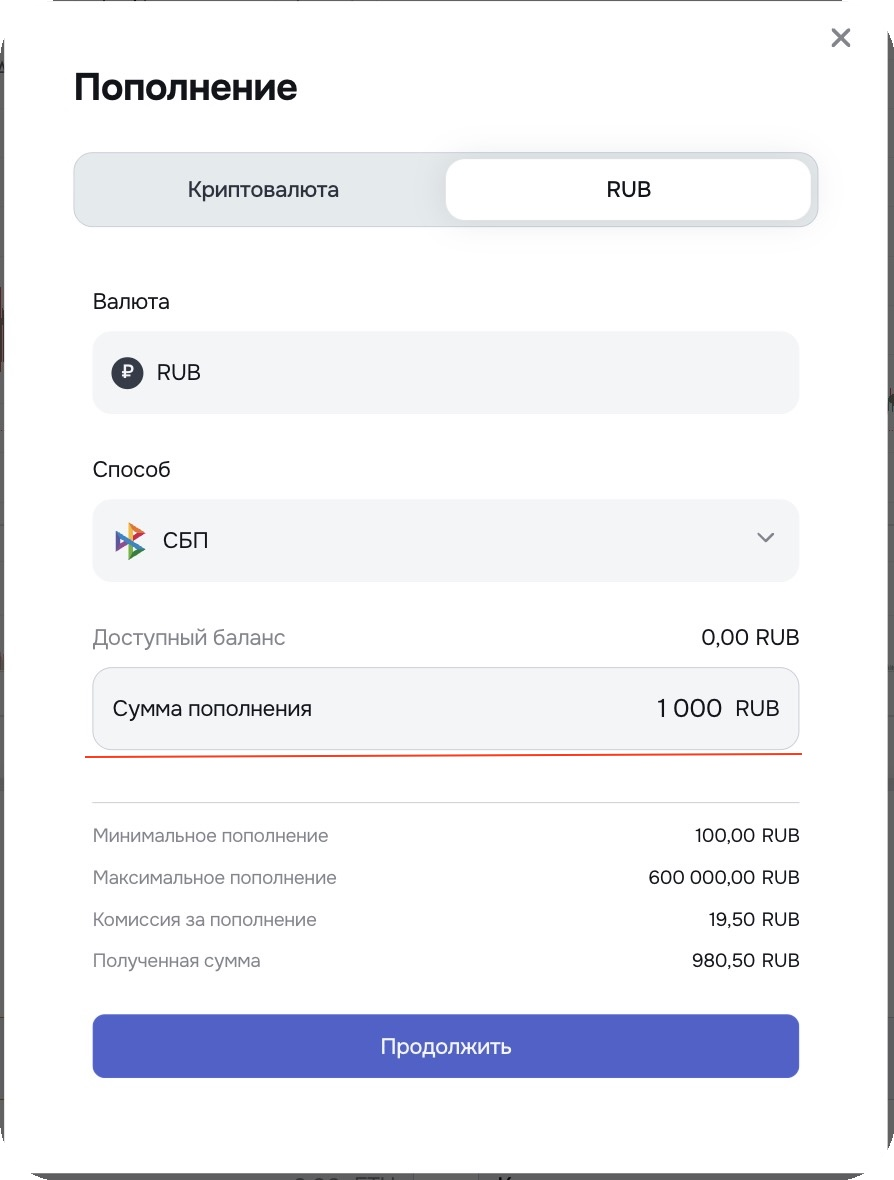
2. Specify payment details
Make sure the currency is set to RUB, then in the “Payment Method” field select SBP. After that, enter the deposit amount in rubles, check that the data is correct, and click the “Continue” button.
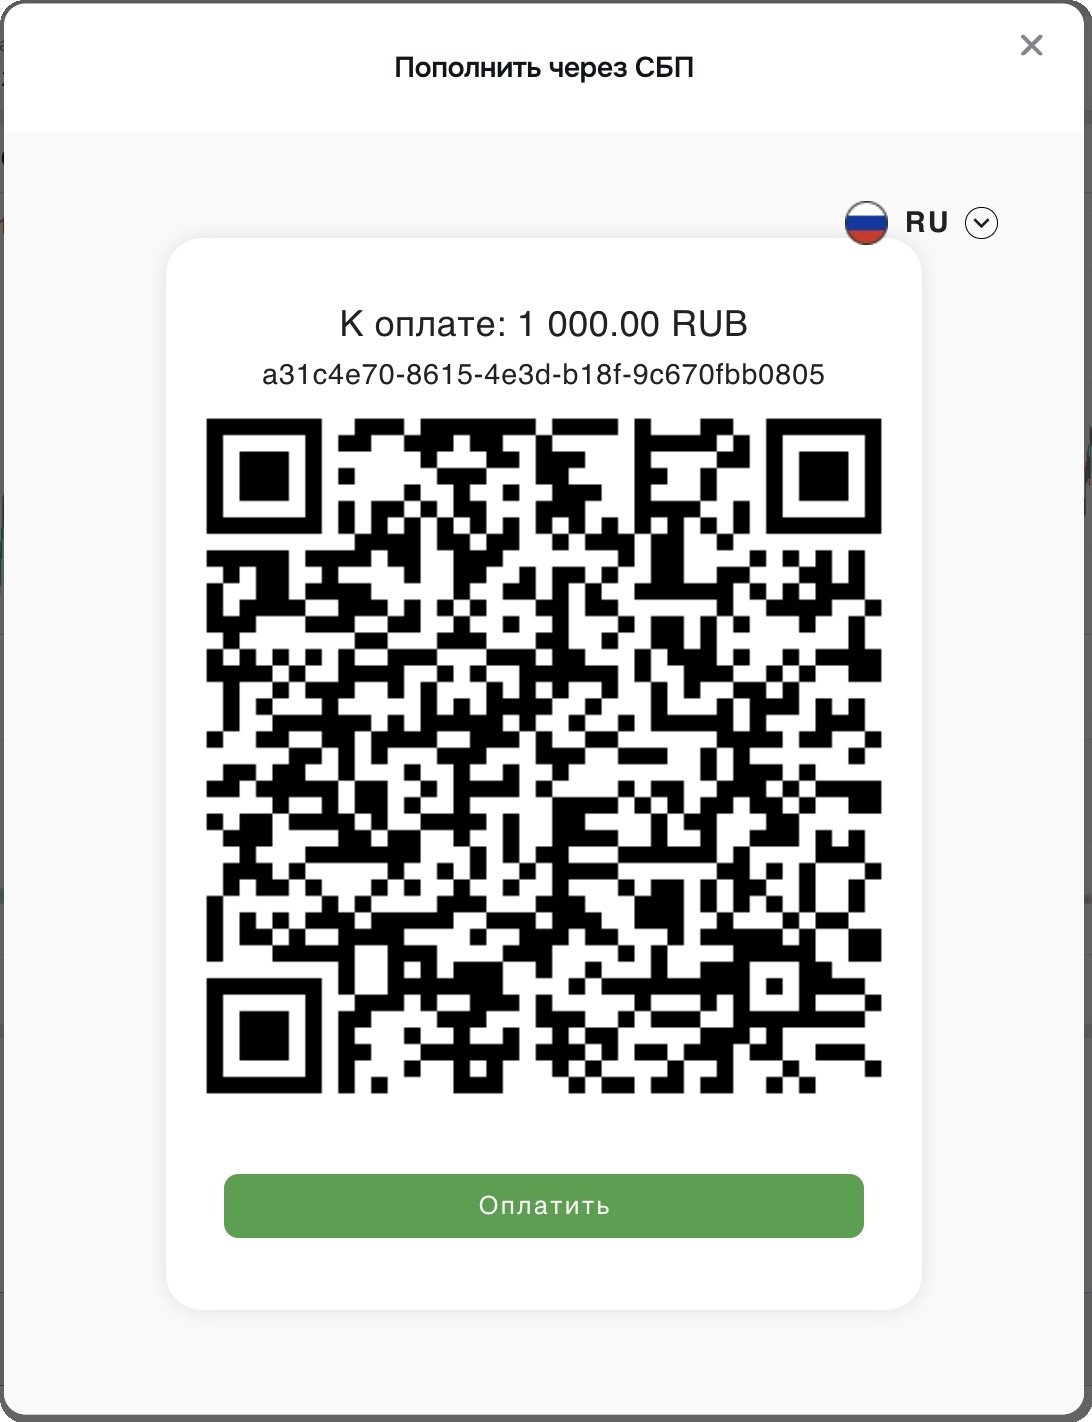
3. Pay via QR code
A payment window with a QR code will open. Scan the QR code using your bank’s mobile app that supports SBP and confirm the payment.
4. Wait for the funds to be credited
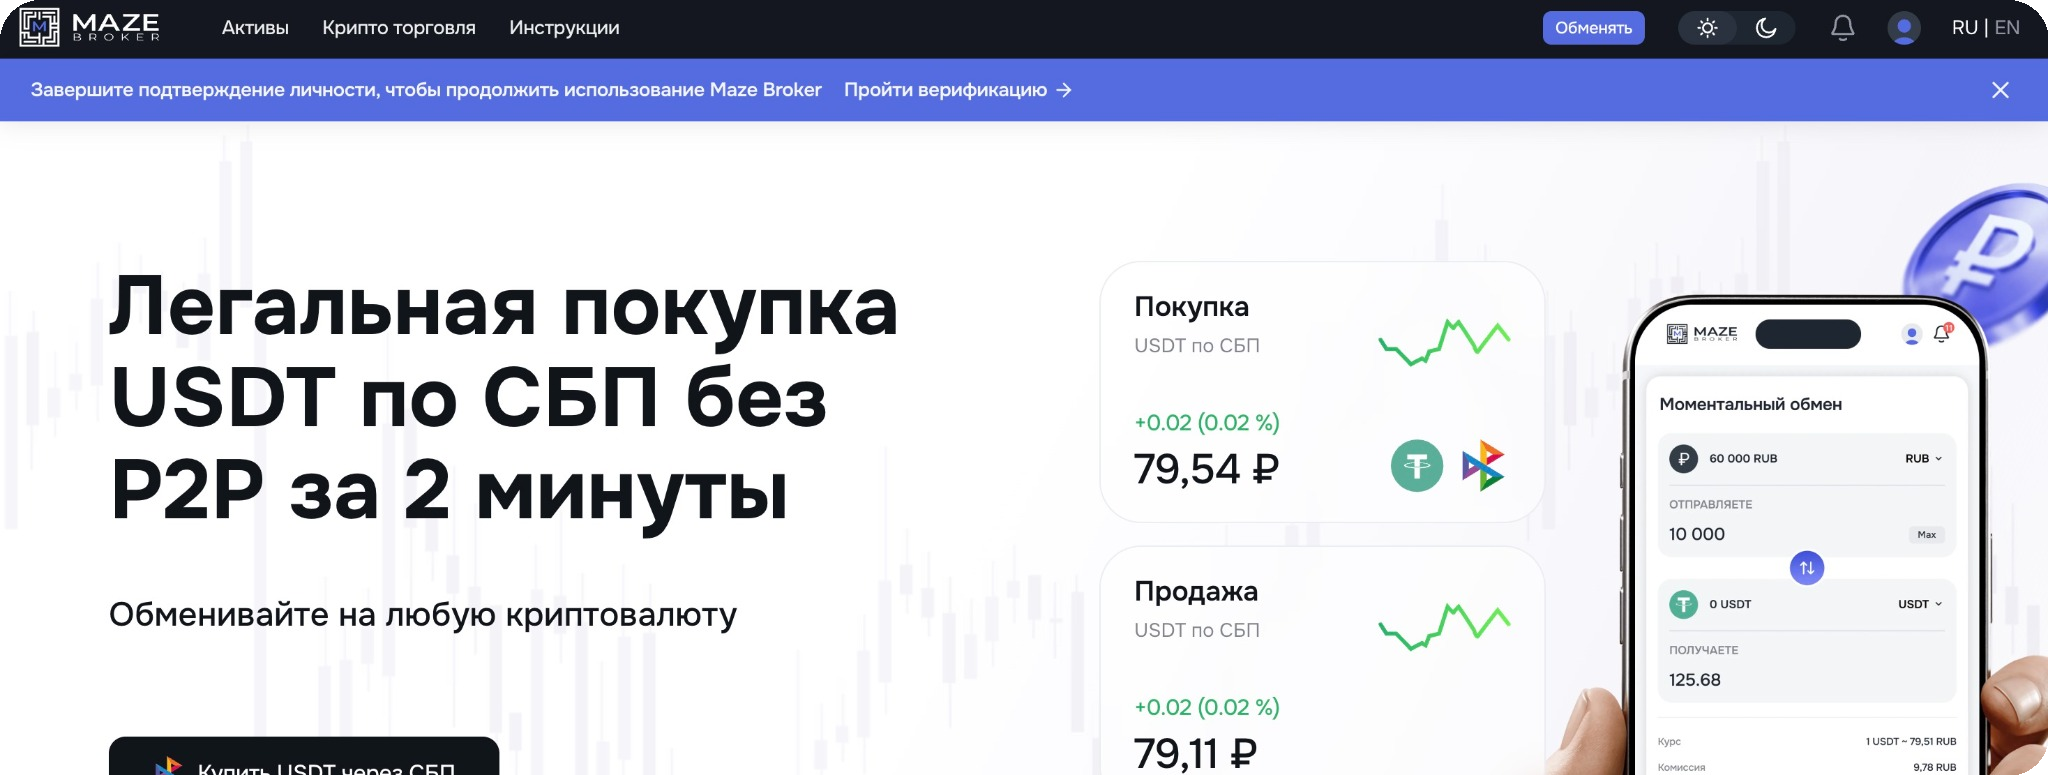
After successful payment, the transaction will be accepted by the system, and the operation will automatically appear in the “Assets → Transaction History” section. At this stage, the status may be displayed as “In progress”.
In most cases, the funds are credited to your ruble balance within 1–5 minutes. In rare cases, the crediting may take up to 15 minutes depending on the sending bank.
If the transaction status remains “In progress” for a long time, it is recommended to wait a few minutes and refresh the transaction history page. If the payment has not been credited, contact support, specifying the deposit amount, date and time of the payment, as well as the bank from which the transfer was made.
The MAZE Broker platform offers a convenient way to top up your balance in rubles via bank transfer, including using a QR code. The process does not require manual entry of bank details and takes just a few minutes.
1. Go to the deposit section
In the top menu of the platform, open your profile icon and click the “Deposit” button — the balance top-up form will open.
In the form, select the RUB (rubles) tab.

2. Choose a payment method
Make sure the currency is set to RUB, then in the “Method” field select “Bank Transfer”.

3. Get the details or QR code
After selecting the payment method, a QR code and the recipient’s details will be displayed on the screen.
You can scan the QR code in your bank’s mobile app or use the provided details to make the transfer manually.
4. Complete the payment
To pay via QR code, open your bank’s mobile app, select QR code payment, scan the code, and confirm the payment.
If needed, you can also save the QR code for later payment.
5. Wait for the funds to be credited
After successfully completing the transfer, the payment will be accepted by the system, and the transaction will automatically appear in the “Assets → Transaction History” section.
At this stage, the status may be displayed as “In progress”.
In most cases, the funds are credited to your ruble balance within 1–5 minutes. In some cases, the crediting may take up to 15 minutes and depends on the sending bank and transfer processing time.
If the transaction status remains “In progress” for a long time, it is recommended to wait a few minutes and refresh the transaction history page.
If the funds have not been credited, contact support, specifying the deposit amount, date and time of the payment, as well as the bank from which the transfer was made.
Creating an account consists of several short steps. The entire process usually takes just a few minutes.
1. At the top of the screen, click the “Start verification” button.
2. Confirm the terms and click the “Next” button.

3. Click “Enable 2FA”
You will see the “Secure your account” screen. Click the Enable 2FA button.

– Install an Authenticator app
If you don’t have one yet — download Google Authenticator (or any other authenticator app).
If it is already installed — just proceed to the next step.
– Scan the QR code
Open the Authenticator app on your phone → add a new account → scan the QR code from the MAZE Broker screen.
If scanning is inconvenient — you can enter the code manually (it is shown next to the QR code).

– Enter the code from the app
After adding the account, the app will start generating 6-digit codes.
Enter the current code in the field on the website and click Continue.
– Done — 2FA is enabled
Now login and important actions will be confirmed with a one-time code. This protects your account even if someone learns your password.
4. Final step — identity verification.
Upload a document. Any official document is accepted: passport, ID card, or residence permit.
Take a photo of the document in full — all edges must be visible, without glare or blur. Sometimes the system will ask for a selfie — this is a standard check and takes only a few seconds.
Wait for verification. Usually, the verification is automatic and takes a few minutes. In some cases, manual review is required — then it may take up to 24 hours. After approval, all features will be unlocked: trading, crypto deposits and withdrawals, as well as ruble deposits and withdrawals.
Done — registration and verification are completed once. After that, you can use the platform without restrictions.
A market order allows you to buy or sell an asset at the current market price — the trade is executed instantly, without waiting for the price to match orders in the order book.
1. Go to the section
Go to the “Crypto Trading” section in the top navigation bar and select the desired trading pair, for example ETH/USDT or USDC/USDT.

2. Select the order type
Under the chart, switch to the “Market” tab.
This order type automatically sets the price based on the current market.
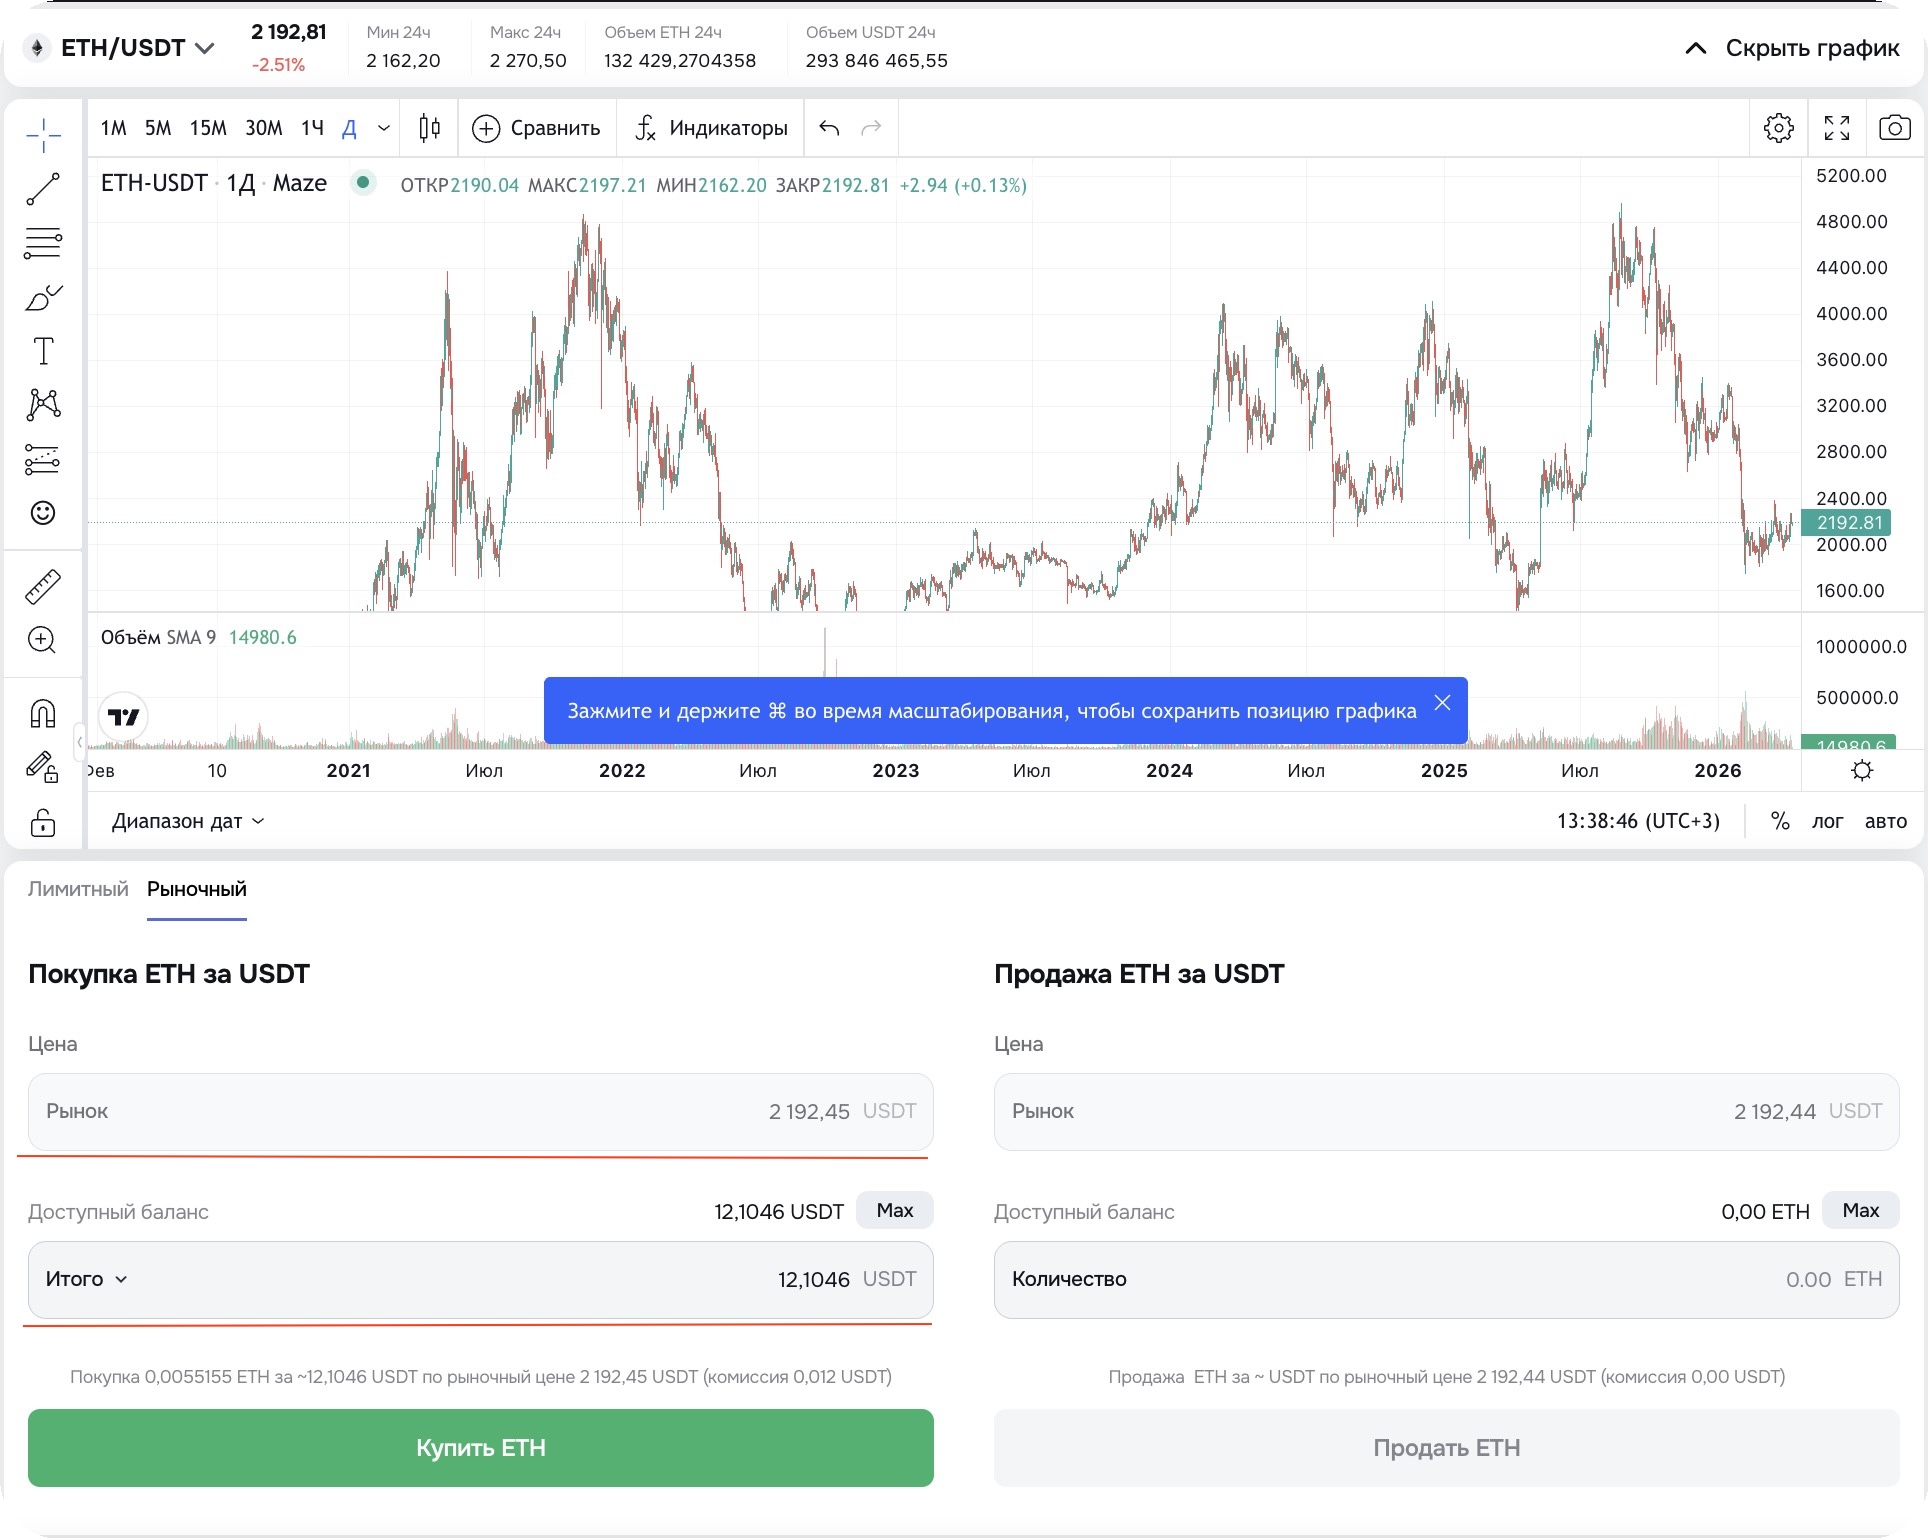

3. Choose the trade direction
Depending on what you want to do:
Buy — use the left “Buy” panel.
Sell — use the right “Sell” panel.
4. “Price” field
The field is filled automatically with the current market price. There is no need to change it — the trade will be executed instantly.
5. Confirm the order
To buy, click “Buy” (for example, “Buy ETH”).
To sell — click “Sell”.
After clicking, the trade will be executed instantly at the best available price.
6. Check the executed order
After placing a market order, you can check the result at the bottom of the page in the “Order History” tab.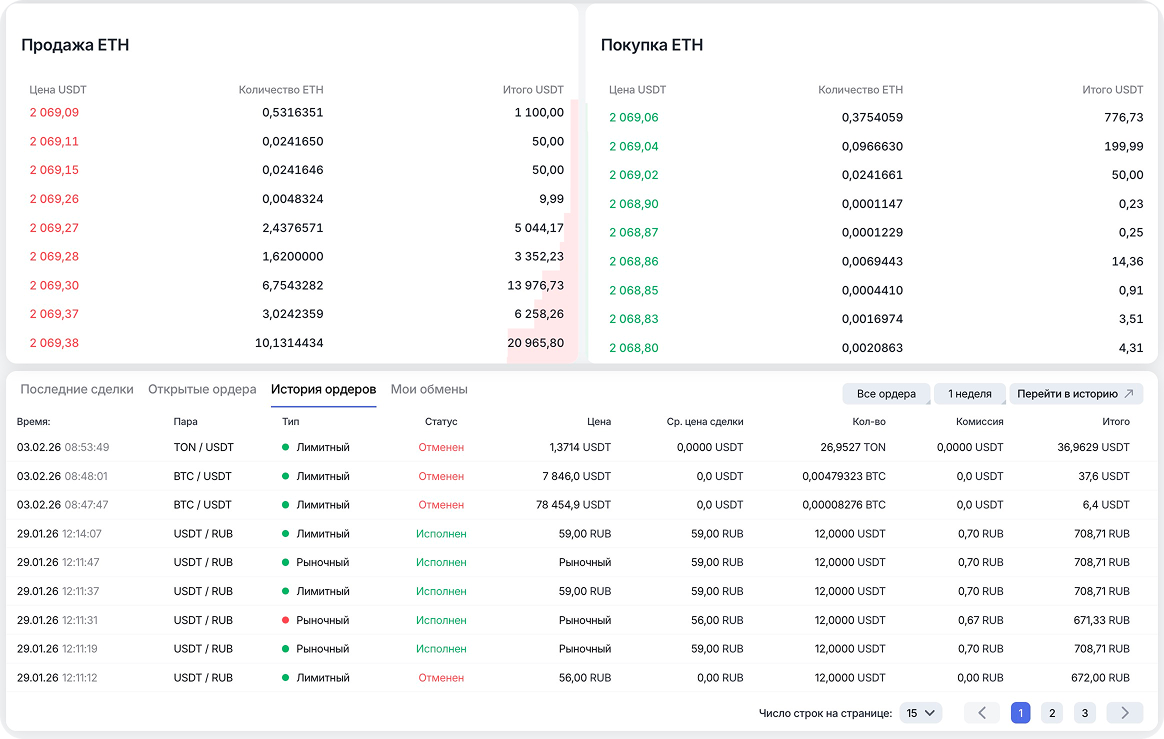
7. Check your balance
You can also check your balance in the “Assets” tab.
💡Tip
A market order is the best choice for those who want to buy or sell an asset immediately without waiting for a specific price.
If you want to place an order at a specific price, use a limit order.
Adding and confirming a phone number in MAZE Broker is simple. Follow this short guide.
1. Go to the “Security” section.
In the “Phone” block, click the “Add” button — a form will open where you can enter your number. It’s simple and will take less than a minute.

2. Enter your phone number in international format (for example, +7 9XX XXX-XX-XX).
Choose a convenient way to receive the code via SMS, then click “Get code”. This will take just a few seconds.
4. Enter the code or request it again.Enter the code you received via SMS to confirm your phone number.
If the message does not arrive within a minute, click “Resend” — a new code will arrive within a few seconds.
5. Phone added.
Congratulations — your number has been successfully confirmed! You can now return to your profile and use all the features of MAZE Broker: transfers, deposits, and withdrawals.
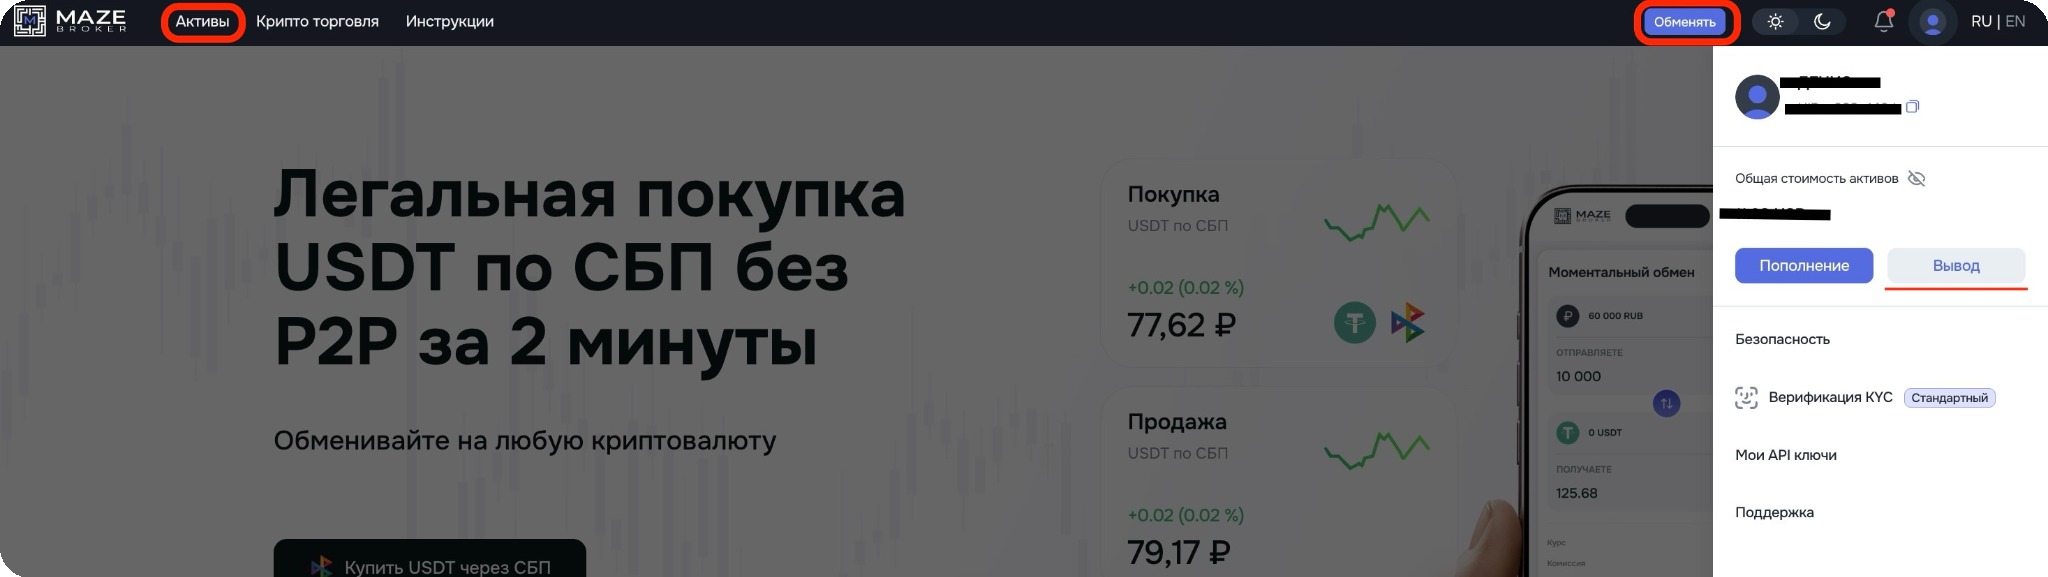
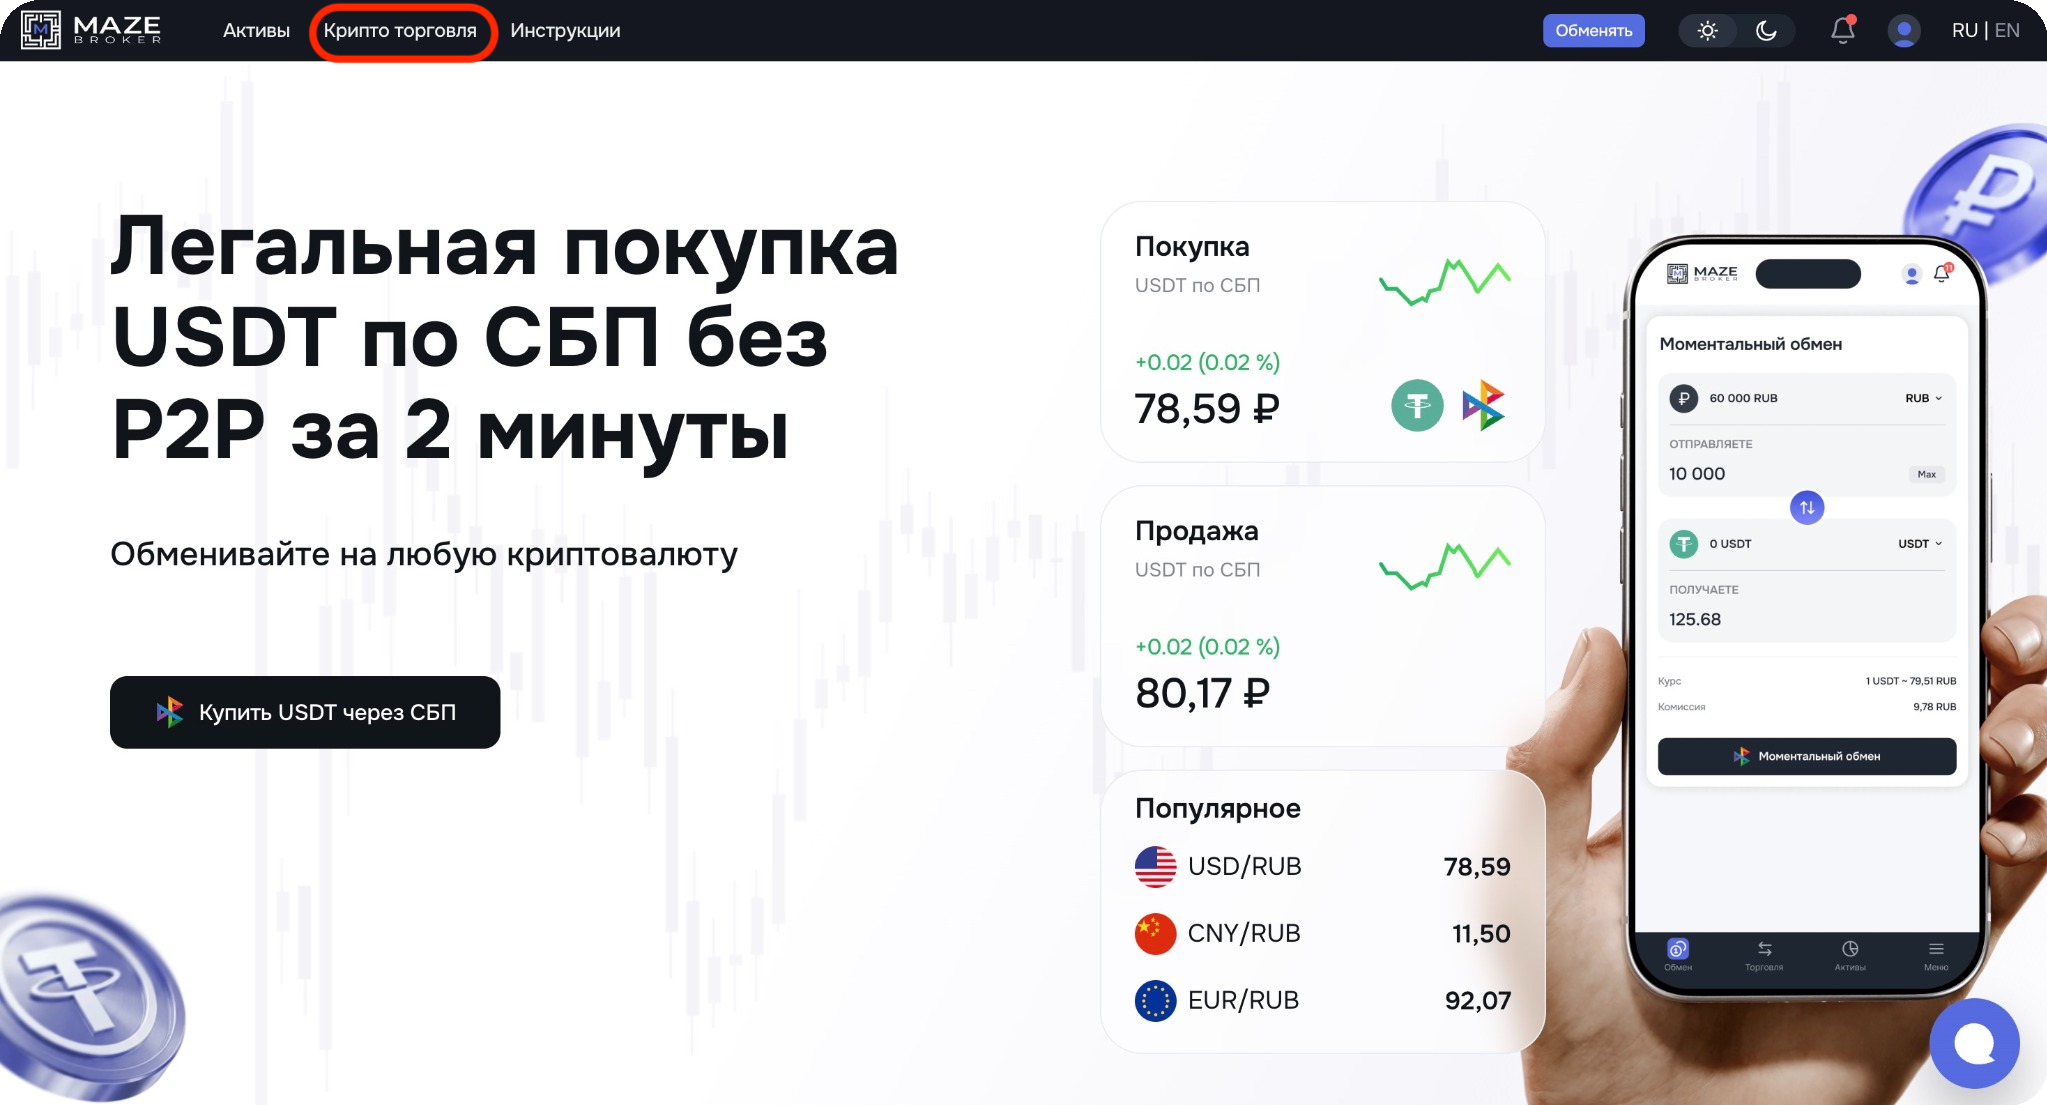
You can exchange rubles for cryptocurrency or vice versa on MAZE Broker in just a few seconds — without orders, charts, or waiting for execution. The service automatically calculates the rate and completes the transaction instantly.
1. Open the exchange section
On the main page of the platform, click “Exchange” in the top menu.
The instant exchange screen will open.

2. Specify what you are sending

In the top “You send” field, select the currency or coin and enter the amount:
- you can choose RUB or cryptocurrency.
- you can click “Max” to use your entire balance
The system will immediately show the available funds in your wallet.
Also displayed:
- current exchange rate
- fee (if any)
- minimum and maximum transaction amount
No hidden charges — the final amount is shown in advance.
3. Confirm the exchange
Click the “Exchange” button.
The transaction is executed instantly, and the funds are immediately credited to your balance.
Done
The funds will be credited to your wallet immediately after confirmation. You can check the transaction in the “Assets” section — there is no need to refresh the page or wait for order execution.
💡When to use instant exchange
- if you need to quickly buy USDT if you need to urgently sell cryptocurrency
- if speed is more important than the exact price
To trade at your own price, use the “Trading” section.
Withdrawing cryptocurrency from the MAZE Broker platform is simple — the entire process takes just a few minutes. Below is where to find the withdrawal section and which parameters need to be specified.
1. Open the withdrawal section.
To withdraw cryptocurrency, there are two options:
Open the profile menu in the top right corner and select “Withdraw”.
Or go to the “Assets” section in the left menu and select “Withdraw”.
2. Select the coin.
In the “Token” field, choose the required cryptocurrency, for example USDT. Available options (USDT, USDC, and others) will appear below — select the one you need.
In the “Network” field, specify the transfer network.
⚠️ The network must exactly match the recipient wallet’s network. If the networks do not match, the funds may be lost.
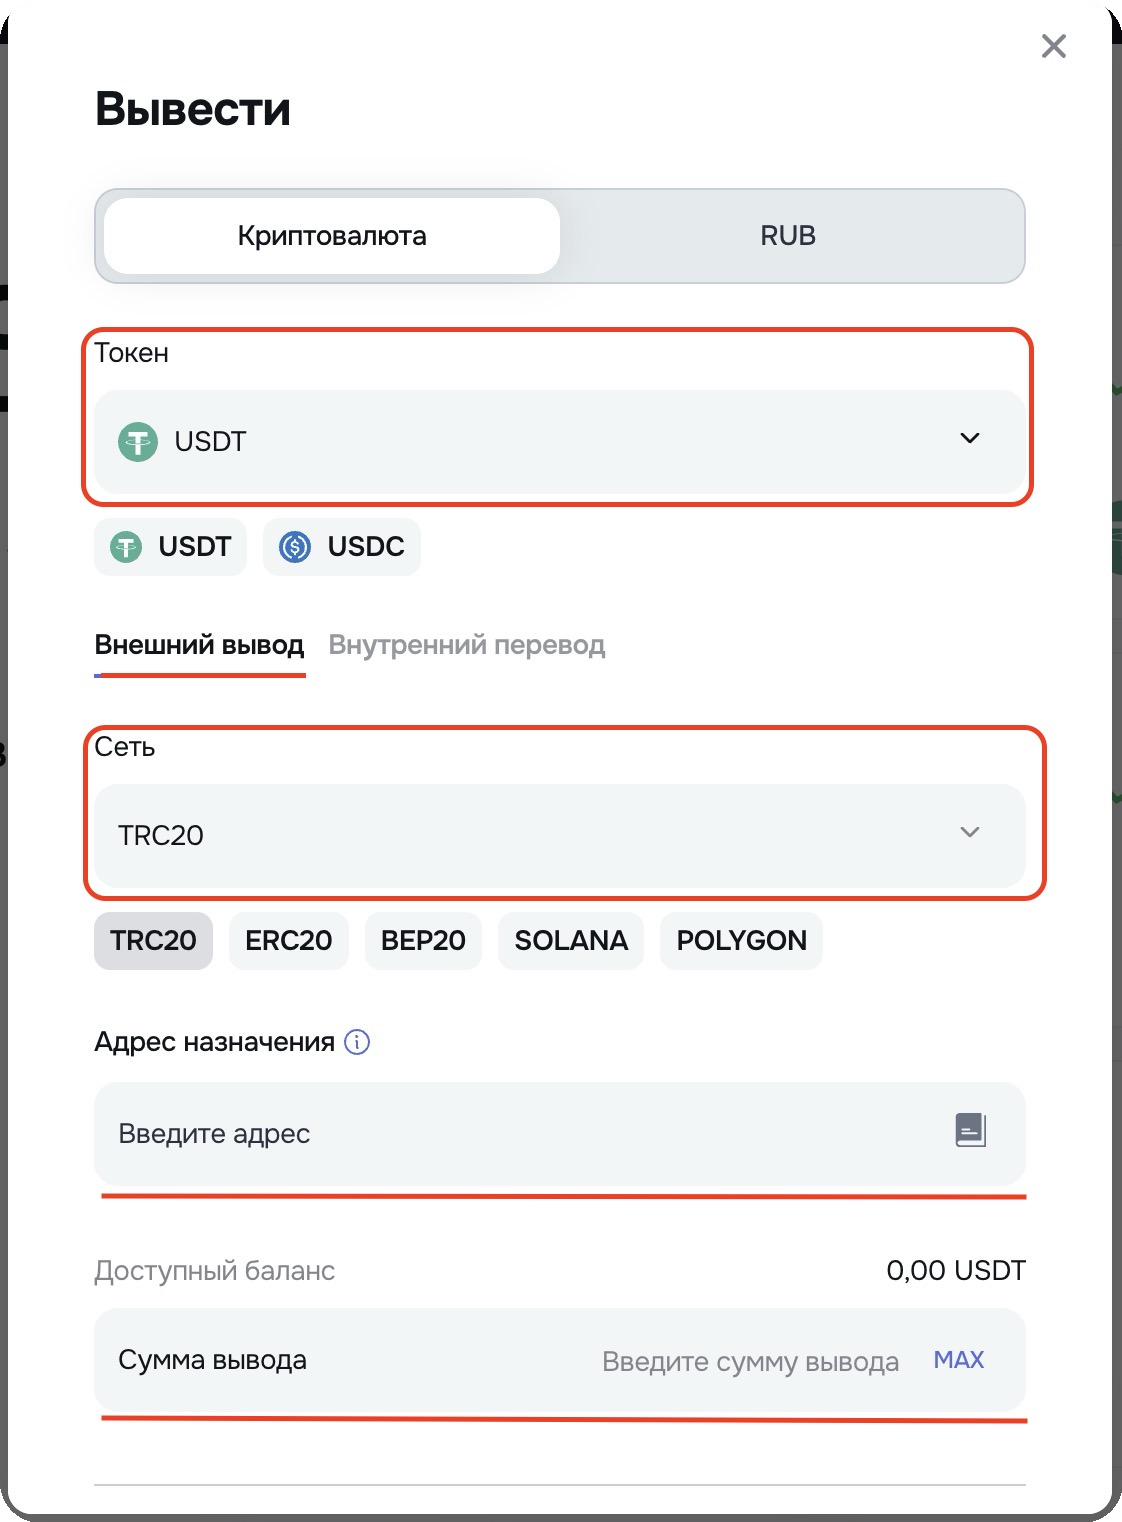
3. Enter the recipient address.
Paste the address into the “Destination Address” field. If needed, you can save it to avoid entering it again.
Recommended:
- copy the address instead of typing it manually
- check the first and last 4 characters
4. Enter the amount.
Enter the transfer amount in the “Withdrawal Amount” field. The MAX button will automatically fill in your entire available balance.
Below, you will see:
- network fee
- final amount to be received
5. Confirm the withdrawal.
Click “Withdraw” and confirm the operation using security codes (2FA / email). After confirmation, the transaction will be sent for processing.
6. Check the transfer status.
After creating the request, you can check its status in the “Assets” section, in the “Withdrawals” tab.
This guide shows how to deposit cryptocurrency into your MAZE Broker account. The process is simple: you send coins to your personal address, and after network confirmations they are automatically credited to your balance.
1. Go to the deposit section
In the top menu, click the “Deposit” button and open the “Cryptocurrency” tab.

2. Important before sending
Before making a transfer, be sure to check:
— The correct token is selected.
The token in the sender’s wallet must match the token specified on the deposit page.
For example: if USDT is selected, you must send USDT, not USDC, DAI, or any other coin.
— The transfer network matches.
The network in your wallet or exchange must match the network specified when generating the deposit address.
Example: USDT TRC20 → send only via TRC20.
— The selected currency is being sent.
The address only accepts the specified asset in the selected network.
Even if the address looks similar, sending another coin to it will not be credited.
— The amount is not below the minimum.
The minimum amount is specified in the deposit window.
Transfers below the minimum value are not credited automatically.
⚠️ A mismatch of the network or token may result in loss of funds and cannot be reversed.
3. Make a deposit

- select the required token (for example, USDT) in the “Token” field
- select the transfer network in the “Network” field
The sending network in your wallet or exchange must exactly match the selected network on the MAZE Broker platform.
- copy the deposit address or scan the QR code
- send cryptocurrency from an external wallet or exchange to the specified address
4. Check the status
Wait for blockchain confirmations — after that, the funds will automatically appear on your balance.
The transfer status is displayed in the “Recent Deposits” section of your MAZE Broker account, where you can see the amount, network, and transaction hash.
If the funds are not credited for a long time, contact MAZE Broker support and provide the TxID of your deposit transaction.
You can withdraw RUB from your MAZE Broker balance in just a few steps. Below we show where to open the withdrawal page and what to fill in.
1. Open the withdrawal section.
In the top-right corner, click Deposit. A balance operations window will open — here you can make both deposits and withdrawals. Switch to the Withdraw tab.
2. Select currency.
In the top switcher, choose RUB. After that, the fiat withdrawal form will appear.

3. Choose transfer method.
In the Method field, select a transfer system, for example SBP.
4. Select bank.
In the Bank field, choose the receiving bank, for example Alfa-Bank. ⚠️ The bank must support transfers through the selected system (SBP).
5. Enter withdrawal amount.
Enter the amount in the Withdrawal amount field. The MAX button will automatically insert your full available balance.
- withdrawal fee
- final received amount
6. Confirm withdrawal.
Click Confirm and enter security codes (2FA / email). After confirmation, the request will be sent for processing.
7. Check withdrawal status.
After creating the request, you can always check its status in Recent Withdrawals.

If the transfer does not arrive within the expected time, contact support and provide the amount and time of the operation.
The phone number is used for login and transaction confirmations, so it can be updated in your account settings. Below is where to find this feature and which verifications are required.
1. Open the security profile
Go to the “Security & Profile” section. In the “Phone” block, click “Change” — a window will open where you can enter a new number. It’s simple and takes less than a minute.

2. Enter a new number
Enter your new phone number in international format (for example, +7 9XX XXX-XX-XX). Choose a convenient way to receive the code via SMS and click “Get code”. This will take just a few seconds.

3. Confirm the number
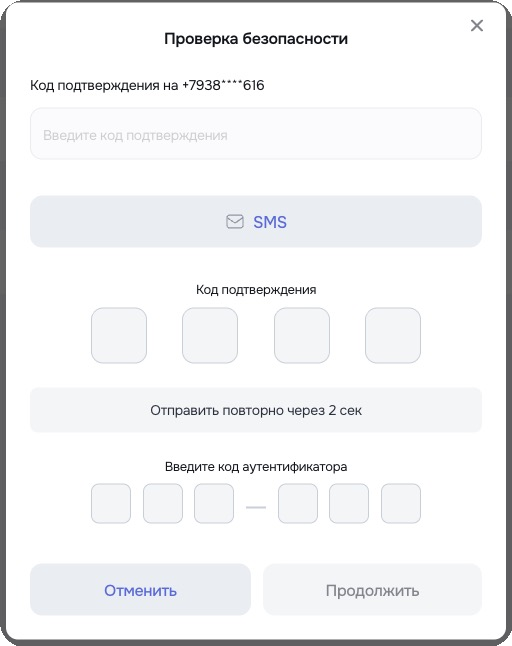
Enter the code you received via SMS to confirm the number change. If the message does not arrive, you will be able to request a new code in the next step.
To complete the operation, you need to enter the code from your email and the code from the Google Authenticator app. This is a standard security measure that helps keep your account safe.
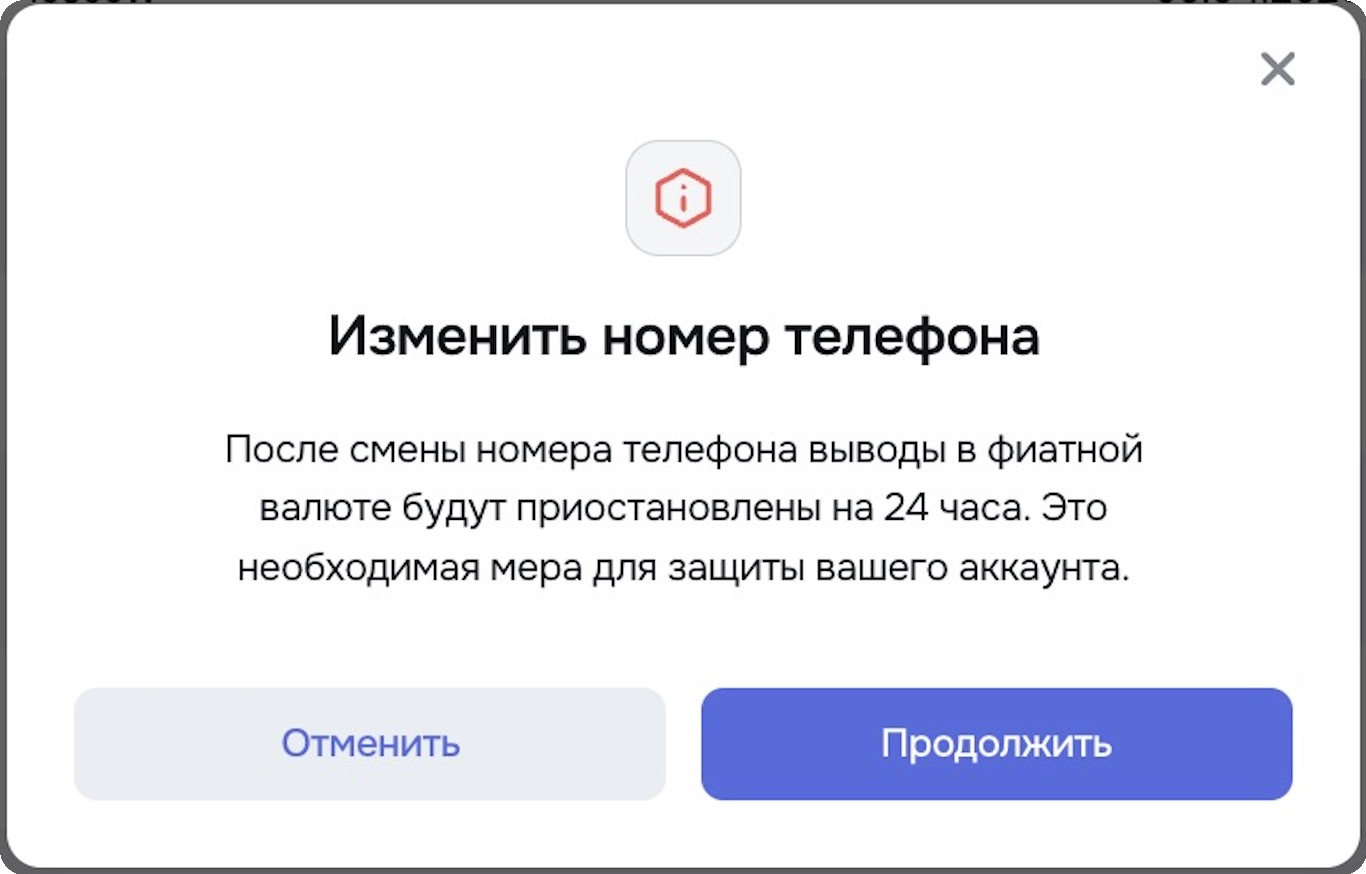
4. Confirm the change
After successfully entering all codes, a notification about the phone number change will appear.
Please note: withdrawals are temporarily suspended for 24 hours — this is a standard security measure to protect your account.
5. If the code does not arrive
If the message with the code does not arrive within a minute, click “Resend” — a new code will be sent using the same method you selected earlier. Usually, the repeated message arrives within a few seconds.
6. Number updated
Congratulations — everything is ready! Your new number has been successfully saved. You can now return to your profile and continue using the platform.
1. A limit order allows you to buy or sell an asset at a price you set yourself.
The trade will be executed only when the market price reaches the level you specified.
To create a limit order:
- go to the “Crypto Trading” section in the top menu.
- select the desired trading pair, for example ETH/USDT.
2. Select the order type.
Under the chart, switch to the “Limit” tab. This order type allows you to set your own price at which you want to buy or sell the coin.
3. Choose the trade direction.
To buy a coin, use the left side of the form — “Buy”. To sell a coin, use the right side of the form — “Sell”.


4. Set the price.
Enter the price at which you want to execute the trade.
5. Enter the amount.
Enter the number of coins you want to buy or sell. If needed, you can use the MAX button to buy ETH using your entire available USDT balance.
6. Total.
The total trade amount is displayed here automatically based on the specified price and quantity.
7. Confirm the order.
To buy, click “Buy”; to sell — click “Sell”. After that, the order will appear in the system but will only be executed when the market reaches your specified price.
8. View open orders.
After placing a limit order, you can track it at the bottom of the page.
In the “Open Orders” tab, all active orders waiting for execution are displayed. If an order is executed or canceled, it will move to the “Order History” tab.
This allows you to monitor your trades, their status, and cancel active orders if necessary.
💡Tip
A limit order is suitable if you want to buy at a lower price or sell at a higher price than the current market price.
If you need to execute a trade immediately — use a market order.